My Tag Blog

Favorite Stores











My Favorite Blogs















Mermaid Kit 16

This tutorial was written by me on June 2, 2024. The results
are of my own imagination. Any resemblance to another tutorial is purely
coincidental.
Please DO NOT claim this tutorial as your own.
This was written assuming you have a working knowledge of
PSP.
Please keep in mind that I write the tutorial as I am
creating it.
Sometimes I may not explain properly where to place things
so please see my example if you are ever in doubt :)
Supplies needed
I am using PSP 2018, but this tutorial should work with any
version.
PTU Kit: I am using a gorgeous kit called "Mermaid Kit 16" created by Luna Bella. This kit contains 2 dolls AI generate by Tamara Scrap Vision, 74 elements and 10 papers. You can purchase the kit here.
Mask: Mask: Mask_Vivienne_0092 by Vivienne. Thank you for your awesome masks. You can download it from her blog here. I am using the png versions for this tutorial.
Font of choice for your name.
Plug in: None
Drop shadow of choice.
Drop shadow of choice. I am using Vertical 0,
Horizontal 3, Opacity 65, Blur 10, color black.
I use Vivienne’s drop shadows quite a bit as I really like
the look of her shadows. Thank you for letting me use your settings for
my tutorials.
Please read all the Artist's/Designer's TOU.
An image can get blurred when you resize an element or tube
in PSP. I use unsharpen mask for each
item. Vivienne has wonderful tips and
tricks on how to do this here.
Please read all the Artist's/Designer's TOU.
Let’s get started.
Open a new 800x800 transparent
image. We will resize later. Flood
fill with white.
Remember to sharpen and drop shadow each image as you create
the tag.
EL 28 – Resize 30%, mirror and move to the upper right of
the tag. Drop shadow.
EL 19 – Drag this layer under element 28 layer and move
under the ship.
EL 60 – Resize 20% and move to the top left of the ship. Drop shadow.
EL 47 – Resize 20%.
Drag this layer under EL 60 layer and move to the top right of EL
60. Drop shadow.
Select the white flood fill layer.
Mask_Vivienne_0092 – Resize 83% and move to the top left of
the tag. Select all, float,
defloat. Add a new raster layer. Open paper of choice. I am using paper 5. Copy the paper, standing on the new raster
layer, go to Edit, paste into selections.
Select none and delete Vivienne’s original mask layer.
El 41 – Resize 55% and move to the top right so it is under
the ship and sand.
EL 4 – Resize 50%, mirror and move to the top left of EL 41. Drop shadow.
Select EL 19 layer.
AI EL 3 – Resize 50% and move to the lower left of EL 4. Drop shadow.
EL 64 – Resize 15% and move to the upper right of the
mask. Drop shadow.
Select the ship layer.
EL 4 – Resize 20% and move to the bottom left of the ship. Drop shadow.
El 22 – Resize 15% and move to the bottom left of the
ship. Drop shadow.
El 5 – Resize 10% and move to the bottom right of the
ship. Drop shadow.
El 57 – Resize 20% and move to the bottom of the ship
between EL 22 and EL 5. Drop shadow.
El 15 – Resize 7% and move to the bottom right of the rocks. Drop shadow.
El 9 – Resize 10% and move to the top left of the rocks. Drop shadow.
El 3 – Resize 40% and move to the top left of the mask. Drop shadow.
EL 18 – Resize 40% and move to the left of EL 3. Drop shadow.
EL 22 – Resize 40% and move to the bottom left of EL 19. Drop shadow.
EL 32 – Resize 20% and move to the lower left of EL 22. Drop shadow.
EL 33 – Resize 15% and move to the lower left of EL 32. Drop shadow.
AI EL 7 – Resize 15%, mirror and move to over element 3. Drop shadow.
AI EL 4 – Resize 50% move to the bottom left of EL 3. Drop shadow.
AI EL 6 – Resize 80% and move to the over to the top left of
the tag. Drop shadow.
El 7 – Resize 40%. Move
to the bottom left of AI EL 4. Drop
shadow.
EL 13 – Resize 15%, mirror and move to the lower left of EL 7. Drop shadow.
Tube (2) – Resize 20% and move to the bottom of the tag so
her hair covers the bottom of EL 3. Drop
shadow.
El 7 – Resize 40%.
Drag this layer under the tube layer and move to the bottom left of the
tube. Drop shadow.
EL 60 – Resize 30% and move to the lower right of element 7. Drop shadow.
EL 46 – Resize 15% and move to the bottom left of element 60. Drop shadow.
EL 13 – Resize 15% and move to the bottom left of element 7. Drop shadow.
EL 61 – Resize 20% and move to the far right of element 7. Drop shadow.
EL 26 – Resize 20% and move to the right of element 61. Drop shadow.
EL 16 – Resize 15% and move to the far right of the bottom
right of element 16. Drop shadow.
EL 25 – Resize 15% and move to the bottom of EL 16. Drop shadow.
Select the tube layer.
EL 59 – Resize 20% and move to the lower left of the tube. Drop shadow.
AI EL 2 – Resize 20% and move to the bottom left of the tube. Drop shadow.
EL 38 – Resize 15% and move to the bottom center of the tube. Drop shadow.
EL 48 – Resize 5% and move to the bottom right of AI EL 2. Drop shadow.
EL 2 – Resize 10% and move to the bottom left of EL 38. Drop shadow.
AI EL 1 – Resize 10% and move to the bottom left of AI EL 2. Drop shadow.
EL 39 – Resize 15% and move to the bottom right of the tube. Drop shadow.
EL 53 – Resize 10% and move to the upper left of element 39. Drop shadow.
Select EL 19 and duplicate.
Move to the upper right of the tube.
Duplicate and move to the lower right of the tube. Duplicate one more time, flip and move to the
upper right of the tube.
Add any other elements you would like on the tag.
Crop and resize your tag. I resize mine to 650px on
the width (if needed) as that is what fits my blog best.
Add your name and copyright.
Hide the white background and save as png.
I hope you have enjoyed my tutorial. I would love to
see your results.
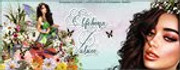
Mermaid Tears

Please DO NOT claim this tutorial as your own.
This was written assuming you have a working knowledge of PSP.
Please keep in mind that I write the tutorial as I am creating it.
Sometimes I may not explain properly where to place things so please see my example if you are ever in doubt :)
Supplies needed
I am using PSP 2018 but this tutorial should work with any version.
PTU Kit: I am using a gorgeous kit called "Mermaid Tears" created by Hania's Design. You can purchase the kit at Elegance Fly here.
PTU Tube: I am using Julsy's beautiful tube Mermaid Tears. Please do not use this tube without a proper license. You can purchase this beautiful tube at Elegance Fly here.
Mask: Mask 12 by Vivienne's Paintbox. Thank you for your awesome masks. You can download it from her blog here. I am using the jpg versions for this tutorial. Open mirror and minimize in PSP.
Please read all the Artist's/Designer's TOU.
Font of choice for your name.
Plug in: None
Drop shadow of choice.
Vivienne's Paintbox has awesome drop shadow settings that I use a lot. You can find the settings here and check out her awesome tutorials :)
Anytime you resize an element or tube you should sharpen it. Go to adjust, sharpness, sharpen.
Let's get started.
Remember to save your tag often in case psp crashes. I always save my tags as a pspimage. It keeps all the layers and if you make tags for others you will always have the template.
Open a new 800x800 transparent image. We will resize later.
Add a new layer and flood fill with white.
Open paper of choice. I am using paper 5, copy and close the original. Add a new raster layer and select all. Standing on the new raster layer, edit, paste into selections and select none. Layers, new mask layer, from image and find the mask in the drop down. Click ok and merge group. You can close the mask as we no longer need it. Resize by 95%.
Open element 115, copy and close the original. Select the top layer and paste. Resize 50%, sharpen and drop shadow.
Open element 62, copy and close the original. Select the top layer and paste. Resize 40%, sharpen and drop shadow. Move to the top left.
Open element 105, copy and close the original. Select the top layer and paste. Resize 40%, sharpen and drop shadow. Move to the right of element 62.
Open element 85, copy and close the original. Select the top layer and paste. Resize 40%, sharpen and drop shadow. Move to the top left.
Open element 94, copy and close the original. Select the top layer and paste. Resize 40%, sharpen and drop shadow. Move to the left about halfway up element 85.
Open element 68, copy and close the original. Select the top layer and paste. Resize 40%, sharpen and drop shadow. Move over the right jellyfish.
Open element 99, copy and close the original. Select the top layer and paste. Resize 40%, sharpen and drop shadow. Move to the bottom left of element 85.
Open element 18, copy and close the original. Select the top layer and paste. Resize 40%, sharpen and drop shadow. Move to the top just right of element 62.
Open element 58, copy and close the original. Select the top layer and paste. Resize 70%, sharpen and drop shadow. Move to the bottom left.
Open element 15, copy and close the original. Select the top layer and paste. Resize 80%, sharpen and drop shadow. Move to the bottom right.
Open element 11, copy and close the original. Select the top layer and paste. Resize 50%, sharpen and drop shadow. Move to the bottom left of the water. Duplicate, drag this layer under the water and move to the top right of the water.
Open element 60, copy and close the original. Select the top layer and paste. Resize 50%, sharpen and drop shadow. Move to the far right of the mask about midway.
Open element 33, copy and close the original. Select the top layer and paste. Resize 50%, sharpen and drop shadow. Move to the far right of the mask about midway.
Open element 71, copy and close the original. Select the top layer and paste. Resize 50%, sharpen and drop shadow. Move to the bottom of the dolphin. See mine for placement.
Open element 22, copy and close the original. Select the top layer and paste. Resize 30%, sharpen and drop shadow. Move to the bottom of the dolphin's tail. See mine for placement.
Open element 41, copy and close the original. Select the top layer and paste. Resize 50%, sharpen and drop shadow.
Open element 94, copy and close the original. Select the top layer and paste. Resize 40%, sharpen and drop shadow. Move to the bottom right on the sand.
Open element 91, copy and close the original. Select the top layer and paste. Resize 40%, sharpen and drop shadow. Move to the bottom right at the top of the water.
Copy your tube. Select the top layer and paste. Resize 20%, sharpen and drop shadow. Move down slightly.
Open element 26, copy and close the original. Select the top layer and paste. Resize 40%, sharpen and drop shadow. Move to the bottom of the tube by her bottom.
Open element 88, copy and close the original. Select the top layer and paste. Resize 30%, sharpen and drop shadow. Move to the bottom left of element 26.
Open element 75, copy and close the original. Select the top layer and paste. Resize 20%, sharpen and drop shadow. Move to the bottom left of the mermaid's tail.
Open element 92, copy and close the original. Select the top layer and paste. Resize 30%, sharpen and drop shadow. Move to the bottom of the tube slightly over the water.
Add any other elements you like and make any adjustments to the layers.
Crop away any extra space. Resize 650 on the longest side, all layers checked.
Add your copyright and name.
Make sure your tag is saved as a psp image file as you do not want to loose it if psp crashes.
Hide the white background and export as png.
I hope you have enjoyed my tutorial. I would love to see your results.
My Blinkie
I CT for