My Tag Blog

Favorite Stores













My Favorite Blogs


















Showing posts with label Animating with mng file. Show all posts
Showing posts with label Animating with mng file. Show all posts
Tuesday, November 12, 2024
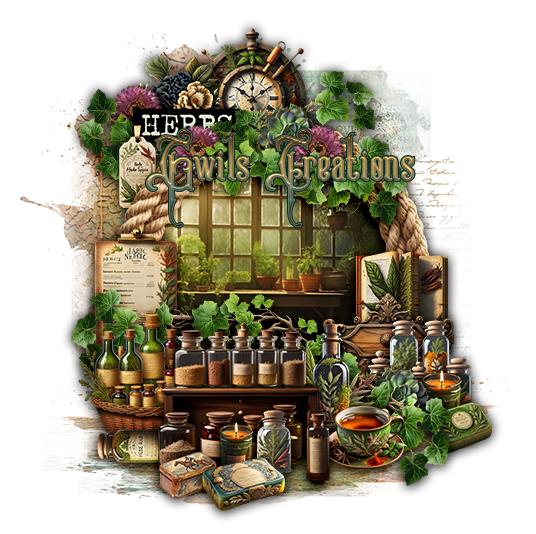
A Steampunk Winter

This tutorial was written by me on November 11, 2024. The results are of my own imagination. Any resemblance to another tutorial is purely coincidental.
Please DO NOT claim this tutorial as your own.
This was written assuming you have a working knowledge of PSP.
Please keep in mind that I write the tutorial as I am creating it.
Sometimes I may not explain properly where to place things so please see my example if you are ever in doubt :)
Supplies needed
I am using PSP 2018 but this tutorial should work with any version.
Animation Shop (Optional)
FTU Kit: I am using a fabulous kit called "A Steampunk Winter" created by Curious Creative Dreams. It contains 125 Elements - 6 Frames - 15 Elements - 5 tubes - AI generated. You can download it from his blog here.
Mask: Mask 0372 by Sophisticat Simone. Thank you for your awesome masks. You can download it from her blog here.
Mask: Mask 92 by Vivienne's Paintbox. Thank you for your awesome masks. You can download it from her blog here. I am using the png versions for this tutorial.
Animation (Optional)
FTU animations by Sophisticat Simone:
Winter Wonderland word art from this pack here.
Blue glow animation from this pack here.
Font of choice for your name.
Plug in: None
Drop shadow of choice. I am using Vertical 0, Horizontal 3, Opacity 75, Blur 10, color black.
I use Vivienne’s drop shadows quite a bit as I really like the look of her shadows. Thank you for letting me use your settings for my tutorials.
Please read all the Artist's/Designer's TOU.
An image can get blurred when you resize an element or tube in PSP. I use unsharpen mask for each item. Vivienne has wonderful tips and tricks on how to do this here.
Let’s get started.
Open a new 800x800 transparent image. We will resize later. Flood fill with white.
Remember to sharpen and drop shadow each image as you create the tag.
Open Simone's mask in PSP and minimize.
Open paper 10 and copy.
Select the tag. Select all, add a new raster layer and paste into selection. Select none. Layers, New mask layer - from image. locate Simone's mask in the drop down and apply. Merge group. Resize 80% and move to the top center slightly to the left.
Element 30 - Resize 40% move to the upper left of the tag.
Element 72 - Resize 35% move to the upper left of element 30.
Element 123 - Resize 40% move to the right of element 72.
Element 4 - Resize 50% move to the left of element 123.
Element 100 - Resize 20% move to the bottom right of element 123.
Element 102 - Resize 25% move to the bottom left of element 100.
Element 75 - Resize 35% move to the bottom left of the tree.
Element 31 - Resize 10% move to the bottom right of element 75.
Element 17 - Resize 10% move to the bottom right of element 75 by the door.
Element 61 - Resize 15% move to the bottom right of element 31.
Element 95 - Resize 10% move to the bottom left of element 61.
Element 13 - Resize 10% move to the bottom of Santa's feet.
Element 62 - Resize 15% move to the bottom left of element 13.
Element 2 - Resize 30% move to the bottom of the bear so the star is touching his shoulder. See mine for placement.
Element 107 - Resize 10% move to the bottom left of the tree.
Element 22 - Resize 5%, free rotate to the left 10 degrees and move to the bottom left of the standing elf. See mine for placement.
Element 119 - Resize 13% move to the bottom right of element 31.
Element 76 - Resize 13% move to the bottom right of the train.
Element 103 - Resize 10% move to the bottom right of element 76.
Element 15 - Resize 10% move to the bottom right of the tree.
Element 60 - Resize 13% move to the bottom left of element 15.
Select Simone's mask. Copy Vivienne's mask and paste as a new layer. Use your deform tool and apply the following settings:
Select all, float, Defloat. Add a new raster layer. Copy and paste paper 3 into selection. Delete Viv's original mask. Move the first mask under the bear. Duplicate - Mirror and move under the building with the crouching elf. This is the settings I used for deform tool. Click on image to enlarge it.

Duplicate this layer and resize to your liking. Move to the bottom right under the sitting elf. This is the settings I used for the deform tool. Click on image to enlarge it.

These are just estimated placements and you might need to make adjustments.
See my tag for placements.
Move the bottom two mask layers under Simone's mask.
Add any other elements you would like and make any adjustments on the tag.
Crop and resize your tag. I resize mine to 650px on the width (if needed) as that is what fits my blog best.
Add your name and copyright.
Hide the white background and save as png if you are not going to animate.
Continue from here if you are going to animate.
Select the mask layer all the way to element 72 by holding down the Ctrl key and selecting each layer. Merge selected.
Select element 4 layer and holding down the ctrl key select each layer until you reach the top layer. Merge selected.
Your layer panel should look like this.

I leave my white background as a separate layer in the event I just want a non animated tag.
Hide all layers except the white background and the bottom merged layer.
Time for some animation time.
Animation:
Open animation shop.
Select prolong paste on the top toolbar.

I do this everytime I open Animation Shop.
We will be working with the .mng files.
Open animation SimoneAni-Fall2023-02 - Select all (Ctrl + A). Animation-Resize animation 25%. 18 frames
Open SS_WinterlandWordAnimation and resize 20%. 16 frames
The two animations have different frame amounts but that is ok. I'm going to show you how to use them with out culling the frames.
Back to PSP.
Only the white background and bottom merged layer should be visible. Edit - Copy special, copy merged.
Back to animation shop and paste as a new animation. Duplicate until you have 18 frames. The amount of frames from the first ani.
The bottom right corner will show you know how many frames you have.
Select all (Ctrl +A) once you have 18 frames.
Select Simone's Fall 2023-2 ani and select all. Edit, copy.
Select your tag. Edit, select all, Edit, paste into selected frames. Your animation will be hanging off your mouse pointer. Move it over the center of the large cog and left click your mouse. Note: Hit Ctrl + Z if you are unhappy with the placement and redo the past into selected frames.
Close Simone's Fall ani as we no longer need it.
Back to PSP.
Close off your white background layer and bottom merged layer. Select all - Ctrl + A - and unhide element 123 layer. This should be the only layer visible.
Back to animation shop and paste as a new animation. Duplicate until you have 18 frames.
The bottom right corner will show you know how many frames you have.
Select all once you have 18 frames. Edit, copy.
Back to your tag,
Edit, select all, Edit, paste into selected frames. Your animation will be hanging off your mouse pointer. Move it move it over to the left of the large cog and left click your mouse. Note: Hit Ctrl + Z if you are unhappy with the placement and redo the past into selected frames. You can also reference your PSP tag to see where it needs to be placed.
Now we will be working with Simone's Winterland Word Animation which only has 16 layers but we need 18 frames. Select the first animation frame (should be highlighted in blue). Go to Edit, Duplicate selected. Select the very last frame of the animation and repeat the last step. You should now have 18 frames.
Edit, select all, Edit, paste into selected frames. Your animation will be hanging off your mouse pointer. Move it move it to the top of element 123 and left click your mouse. Note: Hit Ctrl + Z if you are unhappy with the placement and redo the past into selected frames.
Close Simone's animation and do not save changes.
You should now only have the animated tag visible.
Select all, Animation - Frame Properties and change the speed to 15.
Go to file Save as, gif and click next and next until you hit finished. I use the default settings.
Have fun!!
Wednesday, February 7, 2024
Butterfly Dreams

This tutorial was written by me on July 21, 2020. The results are of my own imagination. Any resemblance to another tutorial is purely coincidental.
Please DO NOT claim this tutorial as your own.
This was written assuming you have a working knowledge of PSP.
Please keep in mind that I write the tutorial as I am creating it.
Sometimes I may not explain properly where to place things so please see my example if you are ever in doubt :)
Supplies needed
I am using PSP 2018 but this tutorial should work with any version.
Animation shop (optional)
PTU Animated tube: I am using a fabulous new Barbara Jensen animated tube "Butterfly Fae" You can purchase this beauty at Barbara's store here. I am using the mng file for this tutorial.
PTU Kit: I am using an awesome kit called "Magic and Moondust" created by Pink Paradox Productions. You can purchase this kit at Barbara Jensen's store here.
Mask: Mask 355 by Mizteeques. Thank you for your awesome masks. You can download it from her blog here. I am using the jpg versions for this tutorial. Open and minimize in PSP.
Font of choice for your name.
Plug in: None
Drop shadow of choice.
Vivienne's Paintbox has awesome drop shadow settings that I use a lot. You can find the settings here and check out her awesome tutorials :)
Please read all the Artist's/Designer's TOU.
Anytime you resize an element or tube you should sharpen it. Go to adjust, sharpness, sharpen.
Let's get started.
Remember to save your tag often in case psp crashes. I always save my tags as a pspimage. It keeps all the layers and if you make tags for others you will always have the template.
Open a new 750x800 transparent image. We will resize later.
Add a new layer and flood fill with white.
Open paper of choice. I am using paper 29, copy and close the original. Paste as new raster layer then go to Layers, new mask layer, from Image and locate the mask in the drop down. Apply the mask and merge group.
Open element 190, copy and close the original. Select the top layer and paste. Resize 60% and sharpen.
Open element 103, copy and close the original. Select the top layer and paste. Resize 40%, sharpen and drop shadow. Move to the top of the mask.
Open element 99, copy and close the original. Select the top layer and paste. Move to up so it is under the moon. Drop shadow.
Open element 185, copy and close the original. Select the top layer and paste. Resize 50%, sharpen and drop shadow. Move to the right side of the moon.
Open element 188, copy and close the original. Select the top layer and paste. Resize 50%, sharpen and drop shadow. Move to the right side of the purple tree.
Open element 11, copy and close the original. Select the top layer and paste. Resize 20%, sharpen and drop shadow. Move over the tree.
Open element 106, copy and close the original. Select the top layer and paste. Resize 40%, sharpen and drop shadow. Move to the right side of the mask about half way down the tree.
Open element 169, copy and close the original. Select the top layer and paste. Resize 40%, sharpen and drop shadow. Move to the top right of the stone fence.
Open element 55, copy and close the original. Select the top layer and paste. Resize 30%, sharpen and drop shadow. Move to the top left of the stone fence. See mine for placement.
Open element 8, copy and close the original. Select the top layer and paste. Resize 40%, sharpen and drop shadow. Move to the lower left of the mask.
Open element 149, copy and close the original. Select the top layer and paste. Resize 40%, mirror, sharpen and drop shadow.
Note: We will be placing out animated tube here.
Open element 153, copy and close the original. Select the top layer and paste. Resize 30%, sharpen and drop shadow. Move to the lower left of the mask.
Open element 183, copy and close the original. Select the top layer and paste. Resize 35%, sharpen and drop shadow. Move to the bottom of the tube.
Open element 175, copy and close the original. Select the top layer and paste. Resize 35%, mirror, sharpen and drop shadow. Move to the right of the tube's shoulder.
Open element 186, copy and close the original. Select the top layer and paste. Resize 40%, mirror, sharpen and drop shadow. Move to the right over the tube's shoulder.
Open element 178, copy and close the original. Select the top layer and paste. Resize 30%, sharpen and drop shadow. Move to the bottom left of the tube.
Open element 172, copy and close the original. Select the top layer and paste. Resize 30%, sharpen and drop shadow. Move to the lower right middle of the mask.
Open element 123, copy and close the original. Select the top layer and paste. Resize 20%, sharpen and drop shadow. Move to the lower left over the leaves.
Open element 135, copy and close the original. Select the top layer and paste. Resize 18%, sharpen and drop shadow. Move to the right and up slightly from the blue rose.
Open element 119, copy and close the original. Select the top layer and paste. Resize 23%, sharpen and drop shadow. Move to the lower left over the blue rose.
Open element 120, copy and close the original. Select the top layer and paste. Resize 25%, sharpen and drop shadow. Move to the lower right side of the mask.
Open element 141, copy and close the original. Select the top layer and paste. Resize 25%, sharpen and drop shadow. Move to the bottom of the purple flower.
Add any other elements you like and make any adjustments to the layers.
Crop away any extra space. Resize 650 on the longest side, all layers checked.
Add your copyright and name.
Delete the temporary tube layer.
Animating the tag. Make sure your tag is saved as you do not want to loose it if psp crashes.
Might want to grab a coffee :)
Open animation shop and open Barbara Jensen's Butterfly Fae.mng in animation shop. Resize the animation by 25%.
Back to psp.
We need to group the bottom layers of our tag. Starting from the Lilac layer (Element 149), holding down the Ctrl key, click on each layer including the white layer. Go to layers, new layer group.
With group1 highlighted, click on the chain link icon.
Still on Group 1, go to Edit, copy.
Back to animation shop. You will notice there are 25 frames in the animation so we need 25 frames for our tag.
Paste as new animation or Ctrl + v.
Now holding the Shift+Ctrl tap the L 24 times for a total of 25 frames.
Select Barbara Jensen's animated tube. Select all (Ctrl+A) and copy (Ctrl+C)
Select the tag layer and select all.
We need to paste into selected frames. Go to Edit, Paste into selection or Ctrl + E.
The tube will be hanging off your mouse pointer. Move the tube into place and left click the mouse.
If you do not like the placement just hit Ctrl + Z to undo it and then Ctrl + E to replace the tube.
Once you are happy with placement you can close out Barbara's tube and do not save.
Back to psp.
Click on they eyeball beside the group layer to hide it.
Select all.
Edit, copy special, copy merged.
Back to animation shop.
Paste as new animation or Ctrl + v.
Now holding the Shift+Ctrl tap the L 24 times for a total of 25 frames.
Select all.
Back to the main tag ani.
Select all.
We need to paste into selected frames. Go to Edit, Paste into selection or Ctrl + E.
The top part of your tag will be hanging off your mouse pointer. Move the it into place and left click the mouse.
If you do not like the placement just hit Ctrl + Z to undo it and then Ctrl + E to redo the placement.
One you have all 25 frames in animation shop, go to Edit, select all then Animation, frame properties.
When the pop up box appears change the number to 20 and click ok.
Go to file Save as, gif and click next and next until you hit finished. I use the default settings.
I hope you have enjoyed my tutorial. I would love to see your results.
Ahoy Sailor

This tutorial was written by me on July 26, 2020. The results are of my own imagination. Any resemblance to another tutorial is purely coincidental.
Please DO NOT claim this tutorial as your own.
This was written assuming you have a working knowledge of PSP.
Please keep in mind that I write the tutorial as I am creating it.
Sometimes I may not explain properly where to place things so please see my example if you are ever in doubt :)
Supplies needed
I am using PSP 2018 but this tutorial should work with any version.
Animation shop (optional)
PTU Tube: I am using a beautiful tube called "Sailor 3" created by Verymany. Please do not use this tube without a proper license.
You can purchase this tube at Verymany's store here.
PTU Kit: I am using a gorgeous matching kit called "Ahoy Sailor" created by Doodle by Design. You can purchase the kit here.
PTU Animation: I am using Kiya Designs awesome animation 50 from package 17. You can purchase her fun animation at her store here.
Mask: Valentine Mask 6 by Dangerously Delicious Dezignz. Thank you for your awesome masks. You can download it from her blog here. I am using the jpg versions for this tutorial.
Font of choice for your name.
Plug in: None
Drop shadow of choice.
Please read all the Artist's/Designer's TOU.
Vivienne's Paintbox has awesome drop shadow settings that I use a lot. You can find the settings here and check out her awesome tutorials :)
Anytime you resize an element or tube you should sharpen it. Go to adjust, sharpness, sharpen.
Let's get started.
Remember to save your tag often in case psp crashes. I always save my tags as a pspimage. It keeps all the layers and if you make tags for others you will always have the template.
Open a new 750x800 transparent image. We will resize later.
Add a new layer and flood fill with white.
Open paper of choice. I am using paper 3, copy and close the original. Paste as a new layer. Layers, new mask layer, from image and find Dee's mask in the drop down. Click ok and merge group. You can close the mask as we no longer need it.
Open element 154, copy and close the original. Select the top layer and paste. Resize 50%, sharpen and drop shadow. Move to the top left of the mask.
Open element 88, copy and close the original. Select the top layer and paste. Move to the top of the mask just left of element 154 and drop shadow.
Open element 153, copy and close the original. Select the top layer and paste. Move to the top center of the mask and drop shadow.
Open frame 5, copy and close the original. Select the top layer and paste. Resize 70% and sharpen. Move to the center of the mask on the right side. Using the magic wand, click on the outside of the frame. Selections, modify, expand by 5. Selections, invert. Select the mask layer and add a new raster layer. Open paper of choice. I am using paper 25, copy and close the original. Select the new raster layer and paste into selections. Keep selected. Copy your close up tube and paste. Resize 70% and move her into a spot you like best inside the frame. Selections, invert and hit delete on your keyboard. Select none. Change the blend mode to Luminance (L) and lower the opacity to 50. Drop shadow the frame.
Open WordArt 8, copy and close the original. Select the top layer and paste. Resize 40%, sharpen and drop shadow. Move to the top left side of the frame.
Open element 97, copy and close the original. Select the top layer and paste. Resize 40%, sharpen and drop shadow. Move to the left of the frame.
Open element 80, copy and close the original. Select the top layer and paste. Resize 80%, sharpen and drop shadow. Move to the bottom center of the frame. Duplicate and move this layer down to overlap. Duplicate one more time and repeat the move down. Merge the three layers together.
Open element 143, copy and close the original. Select the top layer and paste. Resize 40%, sharpen and drop shadow. Move to the top left corner of the frame.
Open element 167, copy and close the original. Select the top layer and paste. Move up slightly and drop shadow.
Open element 169, copy and close the original. Select the top layer and paste. Resize 50%, mirror, sharpen and drop shadow. Move to the right side of the frame.
Open element 95, copy and close the original. Select the top layer and paste. Resize 40%, sharpen and drop shadow. Move to the bottom right of the frame.
Open element 133, copy and close the original. Select the top layer and paste. Resize 40%, sharpen and drop shadow. Move to the right side of the frame.
Open element 103, copy and close the original. Select the top layer and paste. Resize 40%, mirror, sharpen and drop shadow. Move to the left side of the frame.
Open element 98, copy and close the original. Select the top layer and paste. Resize 40%, sharpen and drop shadow. Move to the bottom right of the grass.
Open element 44, copy and close the original. Select the top layer and paste. Resize 40%, sharpen and drop shadow. Move to the bottom left of the frame.
Open element 64, copy and close the original. Select the top layer and paste. Resize 50%, mirror, sharpen and drop shadow. Move to the bottom left side of the frame.
Open element 48, copy and close the original. Select the top layer and paste. Resize 40%, sharpen and drop shadow. Move to the bottom left of the boat.
Open element 24, copy and close the original. Select the top layer and paste. Resize 40%, sharpen and drop shadow. Move to the bottom left of the coral.
Open element 101, copy and close the original. Select the top layer and paste. Resize 25%, sharpen and drop shadow. Move to the bottom left of the bag.
Open element 155, copy and close the original. Select the top layer and paste. Move to the top left of the mask and drop shadow.
Open element 19, copy and close the original. Select the top layer and paste. Move to the bottom of the mask and drop shadow.
Open element 52, copy and close the original. Select the top layer and paste. Resize 30%, mirror, sharpen and drop shadow. Move to the bottom right of the bag.
Open element 120, copy and close the original. Select the top layer and paste. Resize 50%, mirror, sharpen and drop shadow. Move to the bottom left of the trees.
Copy your tube. Select the top layer and paste. Resize 40%, sharpen and drop shadow. Move down and to the left slightly.
Open element 28, copy and close the original. Select the top layer and paste. Resize 30%, sharpen and drop shadow. Move to the bottom left of the tube so it touches her elbow. See mine for placement.
Open element 151, copy and close the original. Select the top layer and paste. Resize 25%, sharpen and drop shadow. Move to the bottom right of the grass. See mine for placement.
Open element 127, copy and close the original. Select the top layer and paste. Resize 20%, sharpen and drop shadow. Move to the bottom right of the grass. See mine for placement.
Open element 77, copy and close the original. Select the top layer and paste. Resize 25%, sharpen and drop shadow. Move to the bottom right of the leaves. See mine for placement.
Open element 6, copy and close the original. Select the top layer and paste. Resize 25%, sharpen and drop shadow. Move to the bottom left of the grass. See mine for placement.
Open element 54, copy and close the original. Select the top layer and paste. Resize 30%, sharpen and drop shadow. Move to the bottom right of the tube so the stars are on the strap of her shoe. See mine for placement.
Open element 47, copy and close the original. Select the top layer and paste. Resize 30%, sharpen and drop shadow. Move to the bottom of the tube in front of her heel of the shoe. See mine for placement.
Open element 159, copy and close the original. Select the top layer and paste. Resize 40%, sharpen and drop shadow. Move over the top of the coral. See mine for placement.
Open WordArt 1, copy and close the original. Select the top layer and paste. Resize 50%, sharpen and drop shadow. Move to the bottom of the tube. See mine for placement.
Open element 85, copy and close the original. Select the top layer and paste. Resize 25%, sharpen and drop shadow. Move to the bottom between the H and O in the Wordart.
Open element 72, copy and close the original. Select the top layer and paste. Resize 25%, sharpen and drop shadow. Move to the bottom of the H in the Wordart.
Open element 21, copy and close the original. Select the top layer and paste. Resize 50%, sharpen and drop shadow. Move to the bottom right of the Wordart by the Y.
Open element 102, copy and close the original. Select the top layer and paste. Resize 18%, sharpen and drop shadow. Move to the bottom left of the lighthouse.
Open element 69, copy and close the original. Select the top layer and paste. Resize 15%, sharpen and drop shadow. Move to the bottom left of the A.
Add any other elements you like and make any adjustments to the layers.
Crop away any extra space. Resize 650 on the longest side, all layers checked.
Add your copyright and name.
Non-animated tag. If you want to keep your tag in layers in case you want to animate at a later date , hide the white background layer and go to file export, png optimizer and export you png tag.
Animating the tag. Make sure your tag is saved as you do not want to loose it if psp crashes.
Might want to grab a coffee :)
Open Kiya Designs animation 50.psd in psp. Duplicate and close the original. Do not save changes.
Standing on layer 16 in the layer pallet, hold down your Ctrl and select the next layer 15. Repeat this until you have all layers highlighted in the layer pallet. All layers selected? Click on the eyeball next to layer one to hide all the layers. Now for the next step.
Go to layers, New group layer. A window will pop open and click ok.
Click on frame layer 1 to highlight it. Now click on they eyeball to make it visible. Scroll all the way to the top. You will see a new layer called Group 1 with all the even layers under it. This is what we want to see :). Beside the group 1 layer you will see a little white arrow pointing down. Click on this to collapse the animation. In the upper right of the layer pallet you will see an icon that looks like a chain link. Click on this. You will now notice a change link on your group 1 layer. This will lock all the layers so when you need to move it or resize it all the layers under group 1 will move or resize at the same time.
Standing on group 1, go to edit and copy. Now back to your tag and paste as a new layer. Unfortunately, the animation will only paste to the very top. Click on the little white arrow beside group 1 to collapse it again. Close off the copy of original animation as we will not need it and do not save.
I want group 1 to be just under the frame layer. Select group 1, left click your mouse and drag the group layer down the layer pallet until it is above the frame. Or you can go to Layers arrange, send to the bottom. Select group one and drag it just above the frame layer.
Resize the animation by 40%, select your pick tool, and move the animation into a spot you like best. I moved mine to the far left of the frame.
Click on the white arrow beside each animation to expand it.
Select frame 1 and adjust, sharpness, sharpen. Repeat for each of the animation frames. Once done with the sharpening, select group 1 layer or another layer above the animation.
Open animation shop.
Back to psp. With only frame 1 of the animation visible, edit, copy special, copy merged.
Back to Animation shop.
Edit, paste as new animation or keyboard shortcut Ctrl+V.
**Back to psp.
Hide Frame 1 by clicking on the eyeball and unhide frame 2 by clicking on the eyeball. Edit, copy special, copy merged.
Back to Animation Shop.
We need to paste after current frame. Go to edit, paste after current frame. Keyboard shortcut Shift+Ctrl+L**
Repeat from **to** until you have 16 frames in animation shop. It will tell you on the bottom right corner how many frames you have.
Select all, Ctrl+A on the keyboard. Animation, Frame properties and change the animation speed to 15.
Go to file Save as, gif and click next and next until you hit finished. I use the default settings.
I hope you have enjoyed my tutorial. I would love to see your results.
Amazon

This tutorial was written by me on July 3, 2020. The results are of my own imagination. Any resemblance to another tutorial is purely coincidental.
Please DO NOT claim this tutorial as your own.
This was written assuming you have a working knowledge of PSP.
Please keep in mind that I write the tutorial as I am creating it.
Sometimes I may not explain properly where to place things so please see my example if you are ever in doubt :)
Supplies needed
I am using PSP 2018 but this tutorial should work with any version.
Animation shop (optional)
PTU Kit: I am using a gorgeous kit called "Amazon" created by Hania's Design. You can purchase the kit at Elegance Fly here.
PTU Tube: I am using Attila's beautiful tube Amazon. Please do not use this tube without a proper license. You can purchase this beautiful tube at Elegance Fly here.
PTU Animation: I am using Sophisticat Simone's animation that is included with the kit.
Mask: Mask 63 by Vivienne's Paintbox. Thank you for your awesome masks. You can download it from her blog here. I am using the jpg versions for this tutorial. Open and minimize in PSP.
Please remember to read the artists/designers TOU.
Font of choice for your name.
Plug in: None
Drop shadow of choice.
Vivienne's Paintbox has awesome drop shadow settings that I use a lot. You can find the settings here and check out her awesome tutorials :)
Anytime you resize an element or tube you should sharpen it. Go to adjust, sharpness, sharpen.
Let's get started.
Remember to save your tag often in case psp crashes. I always save my tags as a pspimage. It keeps all the layers and if you make tags for others you will always have the template.
Open a new 750x800 transparent image. We will resize later.
Add a new layer and flood fill with white.
Open paper of choice. I am using paper 9, copy and close the original. Go to layers, new mask layer, from image. Locate Vivienne's mask in the drop down and click ok. Merge group.
Open element 95, copy and close the original. Select the top layer and paste. Resize 40%, sharpen and drop shadow. Move to the top of the mask.
Open element 102, copy and close the original. Select the top layer and paste. Resize 40%, sharpen and drop shadow. Move to the bottom right of the rock layer.
Open element 43, copy and close the original. Select the top layer and paste. Move up and to the right slightly. Drop shadow.
Open element 106, copy and close the original. Select the top layer and paste. Resize 40%, sharpen and drop shadow. Move to the bottom right of the tree.
Open Wordart 3 copy and close the original. Select the top layer and paste. Resize 50%, sharpen and drop shadow. Move to the top right of the rocks.
Open element 64, copy and close the original. Select the top layer and paste. Resize 70%, sharpen and drop shadow. Move to the bottom of the mask.
Open element 105, copy and close the original. Select the top layer and paste. Resize 70%, sharpen and drop shadow. Move to the bottom left of the mask.
Open element 2, copy and close the original. Select the top layer and paste. Resize 60%, sharpen and drop shadow. Move to the top left of the bamboo.
Open element 100, copy and close the original. Select the top layer and paste. Resize 40% and sharpen. Move to the bottom left of the bamboo.
Open element 45, copy and close the original. Select the top layer and paste. Resize 60%, sharpen and drop shadow. Move to the bottom right so it covers the lion partially. Duplicate and mirror. Move slightly to the left. Drop shadow each layer.
Open element 10, copy and close the original. Select the top layer and paste. Resize 40%, sharpen and drop shadow. Move to the bottom right of the lion.
Open element 19, copy and close the original. Select the top layer and paste. Resize 50%, sharpen and drop shadow. Move to the bottom right of the of the rock.
Open element 23, copy and close the original. Select the top layer and paste. Resize 60%, sharpen and drop shadow. Move to the top left of the mask.
Open element 110, copy and close the original. Select the top layer and paste. Resize 60%, sharpen and drop shadow. Move to the bottom of the trees and bamboo.
Open element 94, copy and close the original. Select the top layer and paste. Resize 40%, sharpen and drop shadow. Move to the bottom left so he is sitting on the rock.
Open element 47, copy and close the original. Select the top layer and paste. Resize 30%, sharpen and drop shadow. Move to the right so it covers the bottom of the leaf.
Open element 69, copy and close the original. Select the top layer and paste. Resize 30%, sharpen and drop shadow. Move to the left so it covers the bottom of the rock.
Open element 116, copy and close the original. Select the top layer and paste. Resize 40%, sharpen and drop shadow. Move to the bottom of the rock on the left.
Open element 113, copy and close the original. Select the top layer and paste. Resize 50%, sharpen and drop shadow. Move to the top of the grass.
Open element 40, copy and close the original. Select the top layer and paste. Resize 50%, sharpen and drop shadow. Move to the bottom so it is above the grass.
Open element 27, copy and close the original. Select the top layer and paste. Resize 30%, sharpen and drop shadow. Move to the bottom right.
Open element 25, copy and close the original. Select the top layer and paste. Resize 30%, sharpen and drop shadow. Move to the bottom of the head.
Copy your tube. Select the top layer and paste. Resize 20%, sharpen and drop shadow. Move down to the bottom of the grass.
Open element 37, copy and close the original. Select the top layer and paste. Resize 20%, sharpen and drop shadow. Move to the bottom right so it covers the tube's knee.
Open element 76, copy and close the original. Select the top layer and paste. Resize 30%, sharpen and drop shadow. Move to the bottom left of the tube.
Open element 41, copy and close the original. Select the top layer and paste. Resize 30%, sharpen and drop shadow. Move to the bottom left of element 76.
Open element 51, copy and close the original. Select the top layer and paste. Resize 30%, sharpen and drop shadow. Move to the bottom left of the book.
Open element 61, copy and close the original. Select the top layer and paste. Resize 20%, sharpen and drop shadow. Move to the bottom center of the tube.
Open element 82, copy and close the original. Select the top layer and paste. Resize 30%, sharpen and drop shadow. Move to the top left of the leaf.
Open element 54, copy and close the original. Select the top layer and paste. Resize 30%, sharpen and drop shadow. Move to the bottom left of the tube on the grass.
Open element 99, copy and close the original. Select the top layer and paste. Resize 30%, sharpen and drop shadow. Move to the top of the palm tree.
Add any other elements you like and make any adjustments to the layers.
Crop away any extra space. Resize 650 on the longest side, all layers checked.
Add your copyright and name.
If you do not want to animate, hide the white background and export at png.
Animating the tag. Make sure your tag is saved as a psp image file as you do not want to loose it if psp crashes.
Might want to grab a coffee :)
Open animation shop.
Open Sophisticat Simone's Animation 27.mng In the bottom right corner it will show you there is 22 frames. We will need this many frames for our tag.
Go to Animation, resize animation and when the pop up box show up, select percentage of Original and change the number to 40. Click ok.
Back to PSP.
Edit, copy special, copy merged.
Back to animation shop.
Edit, paste as new animation or Ctrl + V on the keyboard. Now hold down the Shift + Ctrl and tap the L on your keyboard 21 times. If you look in the bottom right corner you will see you now have 22 frames for the tag.
Select all or Ctrl + A.
Select Simone's animation and select all and copy, Ctrl + C on the keyboard.
Select the tag and go to edit, paste into selections or Ctrl + E on the keyboard.
The animation will be hanging off your mouse pointer. Move it into a spot you like best. I moved mine over the bottle. Once happy with placement, left click your mouse button. If you do not like the placement just hit Ctrl + Z to undo it and then hit Ctrl + E again.
Go to file Save as, gif and click next and next until you hit finished. I use the default settings.
I hope you have enjoyed my tutorial. I would love to see your results.

Valyria

This tutorial was written by me on July 20, 2020. The results are of my own imagination. Any resemblance to another tutorial is purely coincidental.
Please DO NOT claim this tutorial as your own.
This was written assuming you have a working knowledge of PSP.
Please keep in mind that I write the tutorial as I am creating it.
Sometimes I may not explain properly where to place things so please see my example if you are ever in doubt :)
Supplies needed
I am using PSP 2018 but this tutorial should work with any version.
Animation shop (optional)
PTU Kit: I am using a gorgeous kit called "Valyria" created by Hania's Design. You can purchase this kit at Elegence Fly here.
PTU Tube: I am using Abbey Dawn's beautiful tube Valyria and the Dragon. Please do not use this tube without a proper license. You can purchase this beautiful tube at Elegence Fly here.
PTU Animation: I am using the awesome animation by Sophisticat Simone that is included with the kit.
Mask: Mask 42 by Vivienne's Paintbox. Thank you for your awesome masks. You can download it from her blog here. I am using the jpg versions for this tutorial. Open and minimize in PSP and mirror the mask.
Please read all the Artist's/Designer's TOU.
Font of choice for your name.
Plug in: None
Drop shadow of choice.
Vivienne's Paintbox has awesome drop shadow settings that I use a lot. You can find the settings here and check out her awesome tutorials :)
Anytime you resize an element or tube you should sharpen it. Go to adjust, sharpness, sharpen.
Let's get started.
Remember to save your tag often in case psp crashes. I always save my tags as a pspimage. It keeps all the layers and if you make tags for others you will always have the template.
Open a new 800x800 transparent image. We will resize later.
Add a new layer and flood fill with white.
Open paper of choice. I am using paper 2, copy and close the original. Paste as a new layer. Layers, new mask layer, from image and find Vivienne's mask in the drop down. Click ok and merge group. You can close the mask as we no longer need it.
Open element 99, copy and close the original. Select the top layer and paste. Resize 40%, sharpen and drop shadow. Move to the upper left of the mask.
Open element 34, copy and close the original. Select the top layer and paste. Resize 40%, sharpen and drop shadow. Move to the upper left of the by the castle. Duplicate and move to the lower right of the mask. See mine for placement.
Open element 65, copy and close the original. Select the top layer and paste. Resize 50%, sharpen and drop shadow. Move to the upper left by the castle.
Open element 47, copy and close the original. Select the top layer and paste. Resize 80% aand move to the bottom left of the mask. Duplicate and mirror. Move to the upper right of the mask.
Open element 42, copy and close the original. Select the top layer and paste. Move to the top center of the mask.
Open element 65, copy and close the original. Select the top layer and paste. Resize 50%, sharpen and drop shadow. Move to the upper left by the castle.
Open element 29, copy and close the original. Select the top layer and paste. Move to the top center of the gate and drop shadow.
Open element 4, copy and close the original. Select the top layer and paste. Resize 50%, sharpen and drop shadow. Move to the lower left of the gate.
Open element 75, copy and close the original. Select the top layer and paste. Resize 50%, sharpen and drop shadow. Move to the lower left of the gate.
Open element 78, copy and close the original. Select the top layer and paste. Resize 70%, sharpen and drop shadow. Move to the bottom of the gate.
Open element 31, copy and close the original. Select the top layer and paste. Resize 70%, sharpen and drop shadow. Move to the upper left by the of the gate.
Open element 81, copy and close the original. Select the top layer and paste. Move close to the bottom of the mask, duplicate, resize 95% an move to the bottom of the mask. Merge both layers together.
Open element 14, copy and close the original. Select the top layer and paste. Resize 40%, mirror, sharpen and drop shadow. Move to the upper right of the sand. See mine for placement.
Open element 6, copy and close the original. Select the top layer and paste. Resize 30%, sharpen and drop shadow. Move to the lower right of the sand. See mine for placement.
Open element 72, copy and close the original. Select the top layer and paste. Resize 40%, sharpen and drop shadow. Move to the lower right of the sand. See mine for placement.
Open element 66, copy and close the original. Select the top layer and paste. Resize 40%, sharpen and drop shadow. Move to the lower left of the trees. See mine for placement.
Open element 56, copy and close the original. Select the top layer and paste. Resize 60%, sharpen and drop shadow. Move to the lower left over element 66. See mine for placement.
Open element 96, copy and close the original. Select the top layer and paste. Resize 40%, sharpen and drop shadow. Move to the lower left of element 66. See mine for placement.
Open element 59, copy and close the original. Select the top layer and paste. Resize 30%, sharpen and drop shadow. Move to the lower left of element 66.
Open element 83, copy and close the original. Select the top layer and paste. Resize 70%, sharpen and drop shadow. Move down about the middle of element 81.
Copy the Adult dragon tube, I used the rainbow colored dragon, select the top layer and paste. Resize 30%, mirror, sharpen and drop shadow. Move to the bottom center of the mask.
Open element 95, copy and close the original. Select the top layer and paste. Move to the lower right of the dragon and drop shadow.
Copy your tube. Select the top layer and paste. Resize 30% and again by 95%, sharpen and drop shadow. Move down slightly.
Open element 78 again, copy and close the original. Select the top layer and paste. Resize 30%, sharpen and drop shadow. Move to the bottom right in front of the crystal. Duplicate and drag this layer under the tube layer. Move to the left behind the skirt.
Open element 82, copy and close the original. Select the top layer and paste. Resize 60%, free rotate to the right 90 degrees, sharpen and drop shadow. Move to the bottom of the tubes leg to the top of the staff is over the crystal.
Open element 15, copy and close the original. Select the top layer and paste. Resize 35%, sharpen and drop shadow. Move to the bottom left of the staff. See mine for placement.
Open element 41, copy and close the original. Select the top layer and paste. Resize 20%, sharpen, mirror and drop shadow. Move to the bottom right of the leaf. See mine for placement.
Open element 18, copy and close the original. Select the top layer and paste. Resize 30%, sharpen, mirror and drop shadow. Move to the bottom of the mushrooms. See mine for placement.
Open element 100, copy and close the original. Select the top layer and paste. Resize 30%, sharpen and drop shadow. Move to the bottom left in front of the mushrooms.
Open element 7, copy and close the original. Select the top layer and paste. Resize 20%, sharpen and drop shadow. Move to the top left of element 100.
Open element 39, copy and close the original. Select the top layer and paste. Resize 30%, sharpen and drop shadow. Move to the over element 100.
Add any other elements you like and make any adjustments to the layers.
Crop away any extra space. Resize 650 on the longest side, all layers checked.
Add your copyright and name.
If you do not want to animate, hide the white background and export as png.
Animating the tag. Make sure your tag is saved as a psp image file as you do not want to loose it if psp crashes.
Might want to grab a coffee :)
Open Simone's mng animation in Animation shop. Note there are 16 frames. We will need to have 16 frames for our tag.
Go back to psp.
Edit, copy special, copy merged.
Back to Animation shop.
Edit, paste as new animation or keyboard shortcut Ctrl+V. Next holding down the shift+Ctrl tap the L on your keyboard 15 times. This will give us 16 frames to match the animation.
Select Simone's animation and select all. Ctrl+A
Animation, mirror.
Animation, flip.
Animation, resize animation by 40%
With all the frames selected, edit, copy or Ctrl+C on the keyboard.
Select your tag and select all.
Go to edit, paste into selected frames or Ctrl+E on the keyboard.
The animation will be hanging of your mouse pointer. Line up the animation with the baby dragon's mouth. Once happy with placement, left click your mouse. If you do not like how the animation looks , hit Ctrl+Z on the keyboard then repeat the Ctrl+E and line it up again.
Close Simone's animation and do not save changes.
Now we need to slow down the animation. Go to Edit, select all or Ctrl + A. Animation, frame properties. In the display Time (in 1/100th sec): box type in 12 and click ok.
Go to file Save as, gif and click next and next until you hit finished. I use the default settings.
I hope you have enjoyed my tutorial. I would love to see your results.
Subscribe to:
Posts
(Atom)
My Blinkie
I CT for